Tuesday, 18 December 2012

Christmas in the Garden

The garden announces festive cheer


I take a walk around the garden and I can see the colours of Christmas all around - right on cue, as if the plants know exactly when to start their display for the festive season.

The New Zealand Christmas bush is bursting with superb red and white flowers - it truly lives up to its name as the flowers appear like Christmas decorations all over the bush. What a sight! A ready made Australian Christmas tree - a gift from nature.


Red is everywhere in the garden, not only is it my favourite colour, but it's perfect for the festive season and marks the beginning of summer. I've placed three pots of bright red geraniums below the stairwell so when I go into the garage and garden they are the first to greet me with their bright and happy colour.


The berries are also out like little red beacons in the greenery. Although there are only a few plants at present, they still produce enough berries for a daily taste of raspberries, red currents and strawberries. My favourites are the tiny alpine strawberries. They are so flavoursome, the taste is so strong and resembles sherbet lollies rather than the traditional large strawberry. I will definitely need to plant many more berry bushes next year as it has been wonderful each day to wonder into the garden and pick the fruit straight from the bush. The regular strawberries are the only ones not to have produced as expected. Many are eaten by bugs before they fully ripen so now I pick the strawberries just before that point and finish to ripen them on the kitchen bench. I will need to find out what to do about that. Anyone has any suggestions?


The satisfaction is that you can go from that.....


To this.... a scrumptious summer berry tart!


The rainbow silver beet is also showing off its colours for the festive season.


It's quite amazing to see that the initial plantings are doing so well. I guess plants aren't that dissimilar to people: they need food, water, care and attention to hopefully lead a healthy life.

That said, the only red not to appear in the garden this summer, to my great disappointment, is that of cherries. The two cherry trees have been attacked by cherry slug. A disaster, as cherries are also a favourite of mine. Early in the season I sprayed the cherries to no avail, the slugs returned. I have waged war on the little buggers and although have fought numerous fortnightly battles with Eco-sprays, there are still a few eating away at the tips of the branches. Albeit slowly, I am gradually defeating the slugs as one tree is now clear of any pests. However, this year the loss has been heavy and there are no cherries even though the trees flowered quite prolifically. Any helpful advice on how to deal with cherry slugs is welcomed.

Oh well, means this year I will have to find a local grower and visit a cherry farm to get my cherries.

Tuesday, 11 December 2012

About the Block - Creating a Garden

Transforming the block at Gordon into a garden


Last post I showed you the block as it was in the beginning - a few ornamental trees, some shrubs and the ground completely covered by wood chips to which I added a few vases of potted colour here and there to please the eye.

The property was originally developed in 1992 by a local architect David Hamilton for himself and his family. It was one of the first properties built on the hill, Amber Ridge, in Gordon and he sure got the best pick of the bunch when it comes to the view.

The architect, after a couple of years, decided to relocate with his family to Queensland, a much warmer climate and subsequently sold the property to a university professor who lived alone. The professor unfortunately suffered from a terrible disability; polio had returned to haunt his later years and therefore he was not able to inject the required energy into further transforming the land. I suppose that is one of the reasons why only a few feature trees were planted and all the yard was covered with bark in order to reduce maintenance and suppress the weeds. Completely understandable. To be honest, I don't know how he managed. As I mentioned previously, you have to be pretty fit to live here -there are lots of stairs, steps and slopes both inside and outside the house. However I must say, the property looked very neat and tidy.

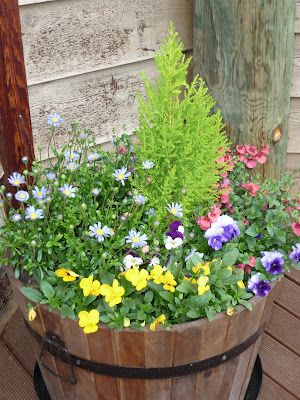
Potted colour around the house to make the garden a little more cheerful
Matthew and I bought the property in 2010 and moved in towards the end of that year. The property overall was in need of considerable repair and maintenance. Since then, we have slowly been transforming the land and trying to turn the block into a garden. Truth be said, the block, as it was previously, was much easier to maintain. As I added borders, paths and plants so the upkeep increased - watering and weeding. On many occasions, the garden has gone out of control!

I was not sure I was doing the right thing changing the garden, particularly as many of my first plantings were unsuccessful. I tried to plants herbs I could use in cooking like rosemary, thyme, sage, basil, mint and tarragon. Only the rosemary survived. It didn't take long for the plants to wither and die. After watering, I started to check the soil and realised that the water was being absorbed by the wood chips and was not reaching deep into the soil to the roots of the plants. The soil beneath was dry as ever, even after considerable watering. Not that there was much soil anyway. The soil was mainly powdery wood from previously broken down bark or bright orange and brown clay.

Rosemary survived the tough dry conditions and heat

To make the back garden look bigger we removed the rear wooden fence palings and replaced them with wire mesh. To my eye, it appears as though the property does not finish at the fence but instead continues into the distance. It's as though the nature reserve behind the back garden were farmland forming part of the property. Nonetheless, the removal of the fence resulted in being able to enjoy the views of the bushland and farmland on the hill. We also decided to remove the fences which separated the front and back gardens so as to be able to move freely from the front to the back of the block and enjoy the views all round. Our neighbours also benefited from the new views.


Removal of the wooden fence opened up the view to the nature reserve behind the back garden


As for the front of the block - I created a path with all the rocks I found lying around the block or had been dug up when planting. It goes to show how many rocks there were as I was able to create a path from the front steps of the house, across the front garden and up the south side of the block. There are still many more rocks and stones. I chose to start an initial planting of hardy, drought tolerant plants to create a cool green effect in the front garden. My brother and sister in-law were rennovating their garden at the time and kindly gave me quite a few blue bearded irises. I divided the clumps of irises and spread these throughout the garden beds in a naturalised fashion. The irisies have done well and I was able to get the desired effect. In the next few years the irises should mature and multiply adding to this effect.

I realised that once the initial planting had become established, it has now become easier to plant other varieties of plants, even more delicate ones which require moist conditions. Subsequent plantings have been successful and maintenance less fought with difficulty. The soil has improved somewhat with leaf litter, compost and of course the trusted horse manure.

Finally, I'm on my way to creating a healthier, more fruitful and attractive garden.


Tuesday, 4 December 2012

About the Block - Gordon

It's been pointed out to me that I haven't explained what the land around the house is like. I've been asked to describe the block of land in order to give a better understanding of what the garden and conditions are like and what I have to deal with to achieve my goal of self-sufficiency.

Well, here goes...

The house was built right in the middle of the parcel of land which measures approx 990sq metres. The block of land is retangular in shape with the front and the back of the block being the narrower sides. There is more garden at the front of the house than there is at the rear.

Below is a rough sketch of the site.


The person who lived in the house previously was a biologist - You'd expect a varied selection of flora but no not in this case - the garden was quite bare. The house was surrounded by only a few trees and by old wooden fencing: 

Two  beautiful ornamental flowering cherry trees, a crepe myrtle and a large tulip tree in the front of the block;

Front of block looking towards the street


Two well established olive trees, a native pine and a young Canadian maple in the back;


and a Japanese maple, a pine tree and a robinia along the south side of the house.

 
The entire garden was covered in wood chip mulch only occasionally intrerrupted by a few shrubs (9 in total). Under the mulch there was (a still is) hardly any soil. Most of what is under the wood chip is clay and rock.

The shrubs must have been particularly selected for their ugliness and annoying traits - they are all Australian natives for arid areas, are spikey, have no or minimal small ugly flowers and lose leaves that prohibit growth of any other plant around them due to oils contained in their leaves, a bit like eucalyts. I can understand that these plants may be beneficial during a drought and may attact native wildlife and birds, but they don't. There are so many wonderful native varieties available which explode with colour or have interesting foliage and flowers.


As like many other Australian natives, these shrubs need a considerable amount of water until they become established, you can't move them or they die, too much water and they die, they don't show you any signs if they're sick or diseased, they just die.


I've noticed that birds seem to prefer the nectar of the robinia flowers and of the two shrubs of exception - two beautiful large pink proteas which I have since discovered are not native to Australia but to South Africa.


The best bit to top it all off .... it's all on a slope. Yes, that's right... A steep slope! One you can abseil down. Well, that's exaggerating a bit - but nonetheless, it takes quite an effort to get around the block.

Visitors often reach the front door panting heavily (unless your fit) and on a few occasions pranks have been played on people - The person has been given our address by some (not very nice) friends or acquaintences and these poor persons have turned up to our doorstep sweating and gasping for air to only find out that 'their date or new friend' did not really live here. At least the view would leave them breathless, in a good sense that is.

Not than Matthew and I are fit, far from it, but we must have become accustomed to the steepness. However, after working in the garden for some time, my calf muscles become sore. I must learn to routinely stretch before and after working in the garden.

My initial stage in gardening was simply to make an aesthetic transformation. During the past year, I have been trying to improve the soil and beautify the garden somewhat with bright coloured flowering plants.


Sunday, 25 November 2012

Simple Bread Recipe

An easy bread recipe to start with. It's simple and can be made without too much effort every few days and to get practice before moving on to other types of breads.

Ingredients:


1 kg of  white flour (or 750 gr of plain white flour and 250 gr of wholemeal flour)

20 gr salt (or 10 gr if you want less salt - experiment with the dose to find the best taste for you)

10 gr dry instant yeast

600 gr warm water (not hot - just lukewarm - should feel warm to the touch - about body temperature)


How to make the bread:


1. Mix the ingredients

1. In a large bowl put in the flour, the salt and the yeast. Mix until combined.
2. Slowly pour in the lukewarm water and mix.
3. Keep mixing until it becomes a dough. It should be a bit gooey at first but the more it is worked the easy it is to manage. It should resemble play-dough.

This can be done by hand or by machine. I found mixing it by hand works better. In a machine, I often have to stop and scrape some of the mixture off the sides or push the flour down to absorb the water.

I've been using normal plain white four which I bought in bulk at CostCo and it still turns out okay. However, for a better tasting loaf and more structure it is best to use a strong flour such as baker's flour. I will do some research on local flours available and see how they perform.


2. Knead the dough

1. Lightly flour a bench top - you only need a little space about the size of a dinner plate.
2. Knead the dough for approximately 15 minutes for maximum effect. Push the palms of your hands deeply into the ball of dough, flatten it, roll it, stretch it, bash it, punch it,  throw it on the bench - whatever takes your fancy. Get plenty of air into it!
3. The dough should now feel soft, smooth and warm to the touch.

This is the best bit - truly, it is. Sometimes I pretend it's a mini gym workout for my arms, other times I use it to get frustration or anger out of my system, other times I find kneading relaxing - I let my mind wander and forget what I'm doing, I lose track of time and use it to escape reality , other times I find it quite sensual - the  warm soft dough, the smell of yeast, the ritualistic rocking motion of the kneading, the image of hot bread out of the oven, the smell and the unique taste gives me pleasure.


3. Let the dough rest - First time

1. Put the dough back in the same bowl you mixed it in.
2. Cover the dough with very lightly oiled plastic wrap. (to stop air getting to it and forming a thin crust over the dough)
3. Cover with a clean tea towel.
4. Place in a warm spot in the kitchen (near a window with a bit of sunshine or near the stove -it really doesn't matter if it's not too warm, it'll only take a while longer). Also, make sure there is no draught (no open windows or cross breezes near the dough - it's quite sensitive)
5. Leave to rest for approximately 2-3 hours. (2 hours is quite sufficient. I like to leave mine a little longer).
6. Go and do something else now. Don't watch it rise for the next 3 hours like I did the first time!


4. Knead the dough again

1. Remove the covers.
2. Punch the dough in the middle hard! It should deflate instantly.
3. Remove the dough from the bowl or you can leave it in the bowl and knead it in there.
4. Knead the dough for a couple of minutes. A quick knead suffices. Pull the dough outwards stretching it as you go and then pull the dough back over onto itself. A motion of out, over and  in. I like to think of it as a square - pulling the corners back into the middle. I do this a few times.
5. Shape the dough.

A cob usually works well as also does a free standing rustic loaf (no tin) - you can let your imagination run wild. Make sure you tuck in the dough underneath (give the dough a few strokes down the sides and tuck in underneath)


5. Rest - Second time

1. Cover the dough with very lightly oiled cling film (the same used before) and cover with a tea towel (same one as before)
2. Place on a towel or tray or blanket covered with lightly floured baking paper. (this comes in handy later when you need to transfer the bread to the oven)
3. Leave in warm, draught free place to rest approximately 45 minutes.
4. Wipe any crumbs from the bottom of the oven with a tea towel. Pre-heat the oven to 220'C.
5. Go and do something else.


6. Put the bread in the oven

1. Uncover the bread.
2. With a sharp bread knife, make 3 large and deep incisions diagonally on top of the bread. You can also make another 3 incisions in the other direction to form a criss-cross pattern.
3. Optional - Put a topping on the bread if you want -  mix a teaspoon of salt with a couple of tablespoons of water. Brush the top of the bread with the mixture. The top should then appear sticky and wet. Top with poppy seeds, rolled oats, sesame seeds, etc or leave as is - the salt and water mixture will make the crust thicker and crispier.
4. Slide the bread  with the aid of the baking paper straight into the bottom of the oven.
5. Bake for 25 minutes.
6. Reduce heat to 200'C.
7. Bake a further 20-25 minutes.
8. Take out of oven. Tap bread. Should sound hollow.
9. Allow to cool.

Enjoy!


I was initially put off baking my own bread simply because I though it was too difficult and time consuming. To me, the idea of kneading the bread and waiting hours for it to rise was a waste of precious time and effort when I could drive to the shop and buy a perfect loaf in a matter of minutes or while out shopping.

Now, after having made the effort to make my own bread, I must say, that yes it was hard at first - the kitchen was a mess, flour everywhere, my hair had dough in it, and the bread wasn't always what I wanted it to be. I really wondered why I was bothering. With perseverance, I got better at it - I don't make any mess in the kitchen, I know the amount of ingredients off by heart which makes things quicker, I don't stand around watching and worrying the bread won't rise and I've learnt that bread will never be successful if I use the packet of old yeast I had in the cupboard since last year and thought it was a good idea to use up.

I never expected that having home made bread, the most basic and simplest of things in life, can bring such satisfaction - in the taking on the challenge, in the accomplishment of the task and the enjoyment of a house filled with beautiful baking smells whilst savouring the warm tasty bread lovingly made with healthy ingredients.


Instructions - Cheat Sheet


1. Mix ingredients in a bowl until a dough forms.
2. Knead dough vigorously for approx 15 mins.
3. Place back in bowl and cover with lightly oiled cling film and tea towel.
4. Leave to rise for approx 2-3 hours.
5. Punch in middle to deflate.
6. Knead lightly for a few minutes.
7. Shape bread.
8. Place on tray or tea towel covered with floured baking paper
9. Cover dough with oiled cling film and tea towel.
10. Leave to rise for approx 45 mins.
12. Pre-heat oven to 220'C.
13. Slash top of bread with sharp bread knife.
14. Optional: Top bread with water-salt solution and sprinkle with perferred topping (grains, seeds etc.)
15. Slide the bread into the bottom of the oven.
16. Bake for 25 mins.
17. Lower temperature to 200'C.
18. Bake a further 20-25 mins.
19. Take bread out and tap. Shoould sound hollow.
20. Place on a rack to cool.

Monday, 19 November 2012

Our Daily Bread

Now that I've offered to grow some produce such as the eggplants and capsicums for my dear neighbours, it has dawned on me that I need to find an alternative should I not be successful. In case I am unable to nurture to maturity my vegetables, I've given thought that maybe I should also start developing other skills such as baking and cooking which can serve to produce something else as a substitute.

So hence, I started to bake bread - a first step to enjoying fresh gourmet food. I watched a DVD created by one of the chefs from The River Cottage in the UK on how to make bread. The DVD was given to my by the ESSE wood fire stove agent at Pivot Stoves in Melbourne. After watching the DVD about 20 times and taking notes, I finally felt confident enough to make an attempt at baking my first loaf of bread. It turned out that it wasn't as difficult as I first thought. The divine smell of freshly baked bread permeated throughout the house. I couldn't wait to have a warm slice smeared with fresh creamy butter.

The next time I made bread by following exactly the same recipe, the bread turned out like a Frisbee - flat and hard. A disaster but I  refused to be defeated.

Matthew kindly bought me a book on how to make all breads of the world. A little over zealous but helpful nonetheless. The book served to troubleshoot my bread baking problems and after changing the way I knead and using a better quality yeast, I returned to successfully baking a good loaf.

A little more practice and I'll be able to offer freshly home baked bread to Joe and Lucia if the garden produce doesn't do too well.

Like most things, practice makes perfect and part of learning to bake beautiful bread was to make it frequently. My intention was to no longer have to buy bread but to make it myself regularly. We have toast each morning for breakfast so I need to make a fresh loaf at least every few days. I calculate to make fresh bread while on my rostered days off from work that way I would have enough time to proof the bread and bake it without getting too tired.

The loaves were quite big too, so I decided to bake two smaller ones instead, thereby making the bread last longer before going stale. I eventually became a bit more adventurous and started experimenting with shapes and toppings in preparation for my next more ambitious project of learning to bake the various breads in the 'Breads of the World' book.

A great source of inspiration - The River Cottage in the UK

http:/www.rivercottage.net


Monday, 12 November 2012

Research for Progress

I decided to try and plant something simple to start off with - not too overly ambitious for the novice gardener. Tomatoes seemed like a good choice.

Not knowing which tomatoes to buy and which would do best in my garden or climate, I bought one of each variety I found at the nursery. That way, I thought to myself, I could learn what each variety of tomato looks and tastes like.

I planted each tomato plant near a stake, in neat rows, stapling their identifying label on top of each garden stake.

I also decided to plant leeks - which looked a lot like fine blades of grass. I planted each blade until I completed four perfectly straight rows and placed the label in front of the rows.

Joe and Lucia from next door were watching my progress in the garden plot and asked what else I intended to plant.

I told them about my start on tomatoes, salads and leeks. I told Joe and Lucia that I was experimenting with the varieties and locations of the plants to see which ones would be more successful and produce more abundantly.

Joe commented that the garden resembled somewhat a CSIRO (Commonwealth Scientific and Industrial Research Organisation) research facility.

Okay, so now I'm labelling everything so I know what I've planted and where, so I don't forget what I've planted or get confused with weeds.

I must admit, I have previously attempted to go my own produce. Last year, I planted a couple of plum trees, a couple of cherry trees and a couple of figs with the result of one cherry, one very hard fig and 3 very small plums.

I also bought a packet of what I believed to be mixed French gourmet salad. To be honest, the mixed leaves looked a lot like weeds and didn't taste too good either, not even cooked. They did have pretty flowers though. This year, these 'weeds' have self-sown and are growing rampant around the more sheltered part of the house. I sent Matthew out to do a little weeding an remove some of the bigger weeds. As Matthew pulled out a couple of the weeds, we saw that in actual fact, they were carrots.

So, as you now know, there is good reason for me to be labelling the plants.

Lucia yelled out: " Let's not plant the same things, that way we don't end up with too many of the same thing. I've planted zucchini and cucumbers."
"Good idea", said I. "I'll plant capsicums and eggplant".
What? Me plant capsicum and eggplant? What was I thinking? Why, why, why did I say that?
I have no idea what I'm doing! Now the pressure is on to produce enough capsicums and eggplants for two households.

I got Matthew to quickly clear a spot at the back of the house - a steep sloped area near the back fence which backs onto the nature reserve covered in long grass and rocks (just like the ones in my head).

With a sense of urgency I went to purchase the capsicums and eggplants and more horse manure. I planted them all planted next morning. The kangaroos looked on with curiosity or perhaps with pity at my stupidity.

I placed some capsicums in the plot near the tomatoes (for experimental purposes) together with plants of basil around the edges of the plot to make it look nice and to make its way into pesto and Caprese salad this summer.


Rows of tomatoes and leeks outside the kitchen  
        Matthew pulling out the weeds (carrots)


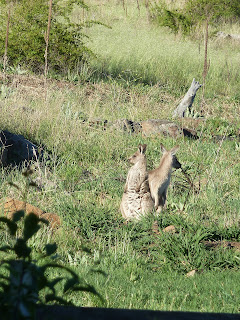
Kangaroos observing my progress in the back garden

Monday, 5 November 2012

Intention Meets Action - Getting Started

There is never a right moment to make a start whatever that may relate to. Some things happen by chance, others take a long period of planning and preparation. Generally, it comes down to the fact of just making a start - that particular moment in which intent is coupled with action.

My moment came on the 1st of September 2012. Maybe symbolic of a new life as it was the first day of Spring or perhaps, the warmer weather inspired me to spend more time outdoors. Whatever the reason, I thought to myself: "This is it."

I referred to my Canberra Gardener's book which told me I could now plant silver beet and lettuce. How hard could that be?

My mission was to make greenery grow. Even if I only planted one vegetable, I would look after it to the best of my ability so that I could learn how the plant grows, what care is required and have the satisfaction of seeing it produce.

I went to the local horse stables in Pialago Avenue, Pialago and bought a couple of big white bags of well seasoned horse manure for $5 each. On the way home, I stopped at Bunnings Warehouse and bought a punnet of very colourful rainbow spinach because it looked pretty; a punnet of chicory, because mum suggested it; 4 pots of alpine strawberries (the entire stock) because they reminded me of my youth spent in the Dolomite's, the alps in northern Italy, where these strawberries are abundant; a punnet of rocket and a punnet of cos lettuce.

I decided to fill two wooden vegetable planter boxes located underneath the front stairs with these exciting new berries and salads.

The soil was prepared with the manure, levelled and the plants added in straight rows. I labelled each row using the tags from the punnets and pots so I would remember what I had planted and where. I covered one planter with a mini green house my brother had made good use of and subsequently discarded.

Each morning I watered these two boxes. Even in the still cold weather and occasional frost the plants kept growing at a good pace. In no time, I had a miniature salad garden. No pests, no diseases, just green juicy lettuce and spinach.


I was proud of my achievement and no longer was satisfied at nursing just two planter boxes. I knew I was destined for greater things and was too ambitions for being content with only a few salad leaves. I set off hunting around the house for suitable spots where I could plant other vegetables and found it...

A levelled plot in front of the kitchen. A plot abandoned and overgrown with an old native bush and clay soil. Poor Matthew (my husband, a big tall bloke and dedicated computer gamer), seemed as though he had been sentenced to forced labour. After I cut the ugly shrub, Matt cleared the weeds and turned over the soil with yet another two bags of horse manure purchased from Pialago.

Now, what to plant....?


Thursday, 1 November 2012

The Weather


Canberra has a fairly dry climate. Rainfall is low and unpredictable but fairly evenly spread over the seasons. The highest rainfall is in late spring.
 
Summers are warm to hot. Thunderstorms occur mainly between October and April, due to to the effect of summer and the mountains.
 
Winters are cool to cold with heavy fog and frequent frosts. Snow in the city is rare but the surrounding areas get snowfall through winter. The snow-capped mountains can be seen from the CBD.

Generally, it is not very windy in Canberra. Strong winds are rare. Winds are more frequent from August to November.

One of the major considerations I have in starting my garden is the climate. I will need to learn about the local climate and understand when best to plant vegetables, flowers and fruit. This I will have to do through research on the Internet, books and magazines as well as tap into local knowledge: friends, neighbours, colleagues, garden clubs and gardening enthusiasts.


Snow capped mountains around Gordon.

Source of information on Canberra's climate

Reference:
The Horticultural Society Of Canberra, 2012. The Canberra Gardener.

My Town Gordon


GORDON


My town near Canberra, Australian Capital Territory


Gordon, the suburb I live in, is located approximately 22km south of Canberra, near the banks of the Murrumbidgee River  and is situated in between Mt Tuggeranong (855m) and Mount Tennent (1,375m). 

The peak forms part of the Namadgi National Park and is named after the notorious bushranger John Tennant who lived there in a hideout in 1827.


Namadgi National Park, Bimberi Nature Reserve and Brindabella National Park (New South Wales) surround Canberra. The highest mountain in the ACT is Bimberi Peak (1912m) which lies at the foot of the Snowy Mountains. Cross country skiing is possible in the area and on Mt Gingera (1855m). Snow also frequently falls in the Corin Forest (1200m).


These locations are all near Gordon, distant only approximately 30 minutes drive.


Canberra is the capital of Australia and has a population of 358,000. It is Australia's largest inland city, covering an area of 814.2 square kilometres and is distant approximately 150 km from Australia’s east coast.

Canberra became capital of Australia in 1913 and is situated in the Australian Capital Territory (ACT). 

Canberra is known as the “Bush Capital” due to its extensive areas of natural vegetation and park lands. The city's design was influenced by the Garden City Movement. This movement originated in the United Kingdom in 1898 and sought to create self-contained communities surrounded by “greenbelts” (parks), containing proportionate areas of residences, industry and agriculture.

Canberra is located near the Brindabella Ranges, and has an elevation of approximately 580 metres. The Brindabellas are visible from the Canberra CBD and add to the charm of the city's landscape.

Source of information on Canberra
Information on Gordon surrounds

Visit Canberra - Namadgi National Park and Visitor Centre
http://www.visitcanberra.com.au/Things-to-do-and-see/Outdoor-and-nature/Business-Details-Page.aspx?ID=9000762&Title=Namadgi+National+Park+and+Visitors+Centre


Also worth reading is this great article: 

Canberra - Australia's Bush Capital

Monday, 29 October 2012

What is this blog about?

I wish to share with others my experiences along the journey towards achieving my ideal lifestyle.


I wish to enjoy the fruits of my labour with others, share tips and lessons learnt, as well as seek advice and guidance from others.


My mission is to create a lifestyle that allows me to:

  • Produce fresh and flavoursome produce in a limited space garden

  • Cook and enjoy great tasting healthy food

  • Be as self-sufficient as can be

  • Source and use local produce

  • Learn to live and enjoy the local climate

  • Achieve a lot on a limited budget

  • Successfully juggle full time shift work, a family, a home that requires considerable maintenance, a holiday home, personal hobbies, a social life, travel, person care and relax time.


I know it's going to be tough but I'm really excited and keen to 'get cracking'.

So here we go.....


I will be posting regular weekly updates on my lifestyle endeavours.